Guide
LEGO® Christmas building ideas
Christmas building ideas for every size of December evening, from a tree and a wreath for the shelf to a snowy village, plus colors, snow and kids' builds.
December is the month most people get their bricks out again. There is a reason to build, a shelf or a windowsill waiting for decorations, and often a few children at home who want to help. The ideas below are sorted by how much time they take, from a decoration you can finish after dinner to a market scene for the slow days between Christmas and New Year. Each one links to a build on this site with its own 3D viewer, step-by-step instructions and parts list, and all but the toddler tree use standard LEGO® bricks.
If you just want to browse, the Christmas collection lists every holiday build in one place.
Small decorations for a shelf or a table
The easiest Christmas builds are single objects that stand on their own. They take under an hour, need no planning and look right anywhere in the house.
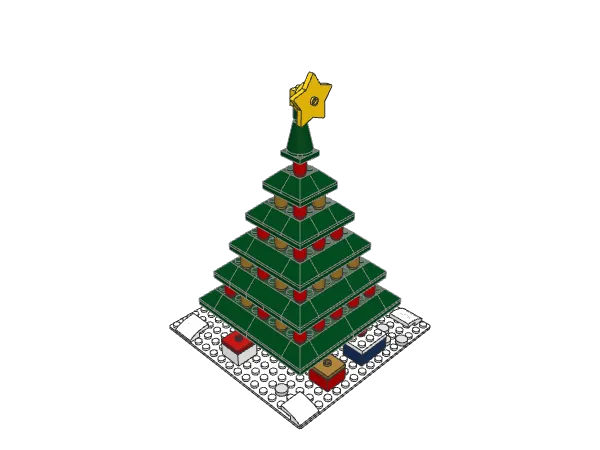
- A Christmas tree. The Christmas Tree stacks five dark green tiers, each narrower than the last, with red and pearl gold baubles under the edges, an upright yellow star on top and wrapped presents underneath. Each tier repeats the same three-part recipe one size smaller, so it is a good first build: by the third tier you will have the rhythm.
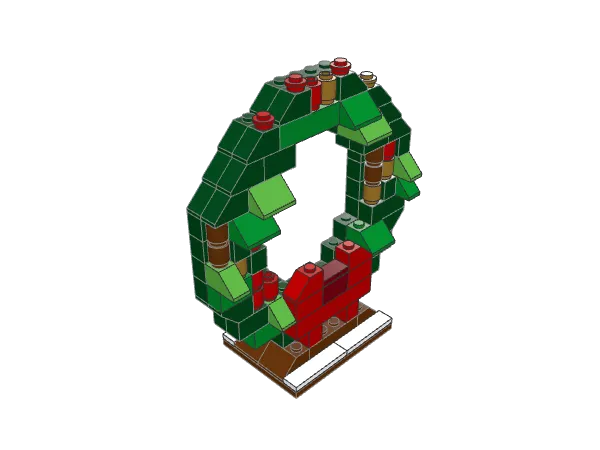
- A wreath. A round shape is hard to make from square bricks, and the Christmas Wreath shows the usual answer: stack rows that each step in or out a little, and soften the corners with slopes, so the eye reads a circle. Because it is built upright on a stand, it works as a shelf decoration rather than something to hang. Red berries, gold baubles, pine cones and a red bow sit on the front.
- A nutcracker. The Nutcracker is a tall red soldier with a black hat, white beard and gold braid, standing on a round base with three walnuts at his feet. Everything stacks on studs, with no sideways building, so it suits a beginner.
- A snowman. The Snowman builds each of its three balls a different way, and shares a snowy plate with a frosted pine, a sled and a lantern.
A slightly bigger option is the Christmas Fireplace: a red-brick fireplace on Christmas Eve with four striped stockings hanging under the mantel, a garland, candles, a clock and a plate of cookies and milk on the rug. It is an indoor scene, so it pairs well with the outdoor builds below.
Tips for decorations
- Pick a spot first. A windowsill is often narrow, so check the depth before you choose. Most of the builds here sit on a 16 x 16 stud plate, about 13 cm square.
- Mind the windowsill. A sunny window is the obvious place for a decoration and the worst one for white parts; see Cleaning, storing and displaying your builds for why, and where to put them instead.
- Build it once, then make it yours. Several of the builds suggest a simple variation in their notes, such as swapping the gold baubles on the tree for white ones to suggest snow, or the gold on the wreath for more red berries.
A small Christmas village
A village is the classic December project because it grows. Start with one building in the first week and add the next as the month goes on, and by Christmas you have a street.
Three builds on this site are designed to stand side by side:
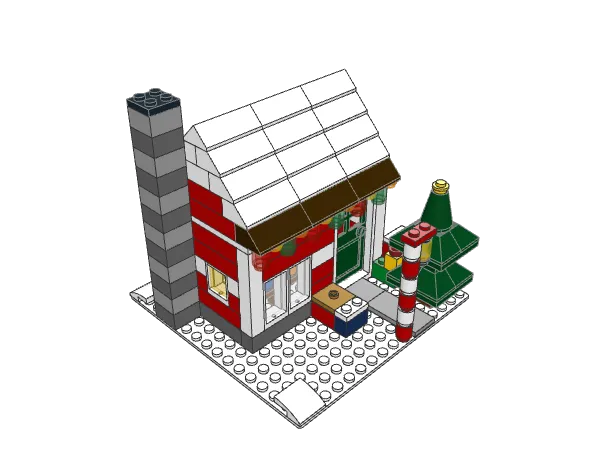
- Santa’s Workshop: a cottage with red walls between white corner posts, a steep snow-covered roof, a stone chimney and a big window onto a workbench of half-finished toys.
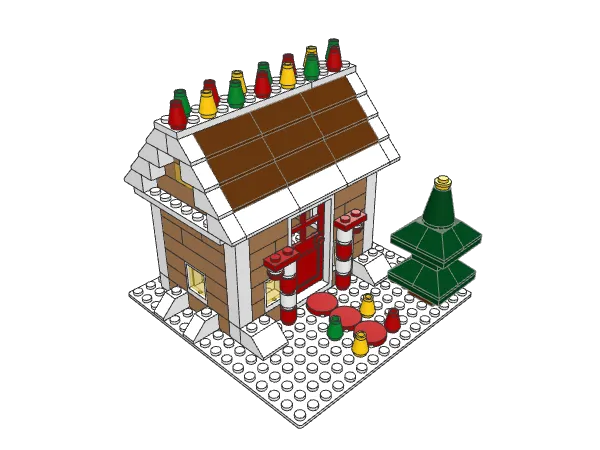
- Gingerbread House: cookie-brown walls with thick white icing on every corner and roof edge, a chocolate roof topped with gumdrops and candy canes by the door.
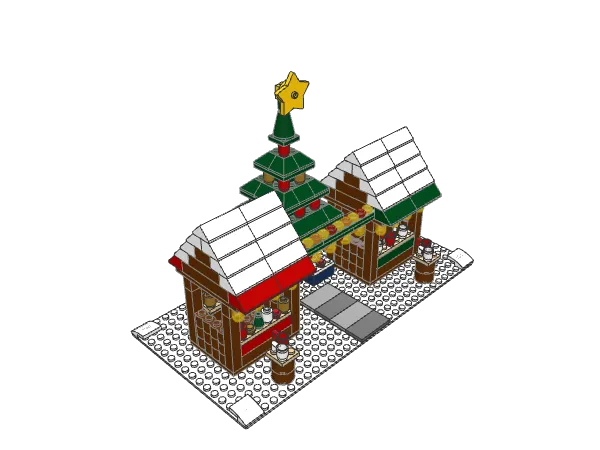
- Christmas Market: two snow-roofed wooden huts selling ornaments and hot drinks, with string lights along the eaves and across the cobbled lane.
What makes buildings look like one village
- The same ground. All three stand on white snowy bases, so the edges disappear when you push them together. If you add your own buildings, give them a white base as well.
- The same base size. The workshop and the gingerbread house each sit on a 16 x 16 stud baseplate, and the market spans a 32 x 16 base, exactly two of them. Keeping to multiples of 16 lets you rearrange the street without gaps.
- A street between them. Line the buildings up with their fronts facing one way and leave the market’s lane in the middle. A row of buildings with a lane through it reads as a street; a cluster facing in every direction reads as a pile of models.
- One light theme. The market has trans-yellow, red and orange string lights, and the workshop has a row of translucent bulbs under its front eave and a lit window. Repeating those warm translucent colors on anything you add ties the village together.
The Santa’s Sleigh makes a good final touch: it sits on its own small patch of snow with tracks where the runners slid in, so it can park at the end of the street.
Bigger holiday projects
If you have a free weekend afternoon, a larger build is more satisfying than several small ones. Here is how the bigger Christmas builds compare:
| Build | Parts | Steps | Good to know |
|---|---|---|---|
| Christmas Market | 252 | 26 | Two huts, a garland across the lane and a tree |
| Christmas Fireplace | 177 | 20 | Stockings are built hanging downward |
| Gingerbread House | 177 | 17 | Icing details on every corner |
| Santa’s Workshop | 159 | 17 | Window and door clip into frames; lights hang under the eaves |
The parts and steps come from each build’s page. The market is the longest: both huts share one design, so the second goes faster, but the garland that crosses the lane needs a roof on each side to hold it, so it can only go on once both huts are done. The workshop has the trickiest small moments, where the window glass and the door clip into their frames and the string of lights is attached hanging down under the roof edge, which is easy to put on the wrong way round.
Colors that read as Christmas
A few colors do most of the work in every Christmas build. Using them on purpose is what makes a small model say “December” from across the room.
- Red for the eye-catching parts: baubles, bows, Santa’s sleigh, the stockings, the nutcracker’s coat.
- Dark green for evergreens. It is darker than the everyday green, which makes it look like fir or holly rather than a lawn. The wreath mixes in a few bright green slopes so the leaves look layered.
- White for snow, icing and trim. It is also the best base color: the dark green of the Christmas Tree stands out most strongly against its white base.
- Pearl gold or yellow for small accents: baubles, the star, the nutcracker’s braid, candle holders. Keep gold to small pieces; a little goes a long way.
- Tan and brown for gingerbread and wood. The gingerbread house uses Medium Nougat, a warm light brown, for the cookie walls, with reddish brown for the chocolate roof.
The general rule from these builds: one dominant color, one or two supporting colors and a small accent where you want the eye to land.
Making snow with plates and tiles
Snow is what turns a building into a winter scene, and it is easy to add with white parts.
- Snowy ground: a white baseplate is the simplest. Add a few white plates stacked one or two high to make drifts, as the sleigh and the snowman do.
- Snow on roofs: build the bottom course of a roof in a darker color and switch to white above it. Both the market huts and the workshop do this, so the snow sits on top and the bare roof edge shows underneath.
- Snow on trees: alternate dark green and white layers. The pine next to the snowman alternates dark green and white inverted dishes so every tier looks freshly snowed on.
- Tracks and paths: a line of smooth tiles in a darker color cuts through the snow. The sleigh’s runner tracks are gray tiles; the gingerbread house uses a path of round red tiles like peppermints.
Smooth white tiles read as packed snow, while studded white plates read as fresh, slightly bumpy snow. Mixing both looks natural.
Building with kids in December
Christmas builds make a good family routine for the month.
- One build per weekend. The four December weekends fit a tree, a wreath, a workshop and a gingerbread house, and by Christmas the shelf is full.
- An advent build. Choose one bigger model and build one step a day. The Christmas Market has 26 steps, so if you start on 29 November, the last step lands on Christmas Eve. Pull out the parts for each day’s step in advance, and let the child find the step in the viewer and press the pieces on.
- Let children choose the colors. The decorations are where color changes cost nothing: the baubles, the presents, the stockings. A tree with blue baubles because a child wanted blue is a better decoration than a perfect copy.
For younger builders, the guide to choosing your first build explains what the difficulty levels mean, and how to read the instructions walks through the viewer and the step list.
Christmas builds for toddlers
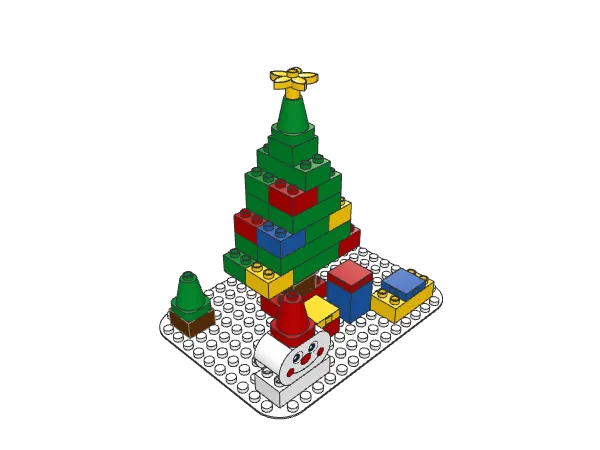
Standard bricks are small parts and are not meant for children under three. For toddlers, the big bricks of LEGO® DUPLO® are the safer choice, and the Toddler Christmas Tree is built entirely from them.
Bright square bricks pushed into the green tiers do the job of baubles, a flower piece on the top cone stands in for the star, and the presents underneath are simple bricks with a lid in a contrasting color. A snowman and two small pines fill the white baseplate around it. It has 37 pieces in 10 steps, which suits a short session with a grown-up next to the child. Once it is built, the presents come off and go back under the tree, which tends to become the game.
After December
A Christmas build spends eleven months of the year in a box, so it is worth deciding early whether it stays assembled. Small decorations such as the tree, the wreath and the nutcracker survive storage whole if each goes into its own box with some soft paper around it. A village is easier to keep as parts: take each building apart, keep its pieces together, and rebuild it from the steps next year, which also gives the family something to do on the first weekend of December. If a color is missing when you rebuild, sorting and finding parts explains how to substitute without spoiling the look.